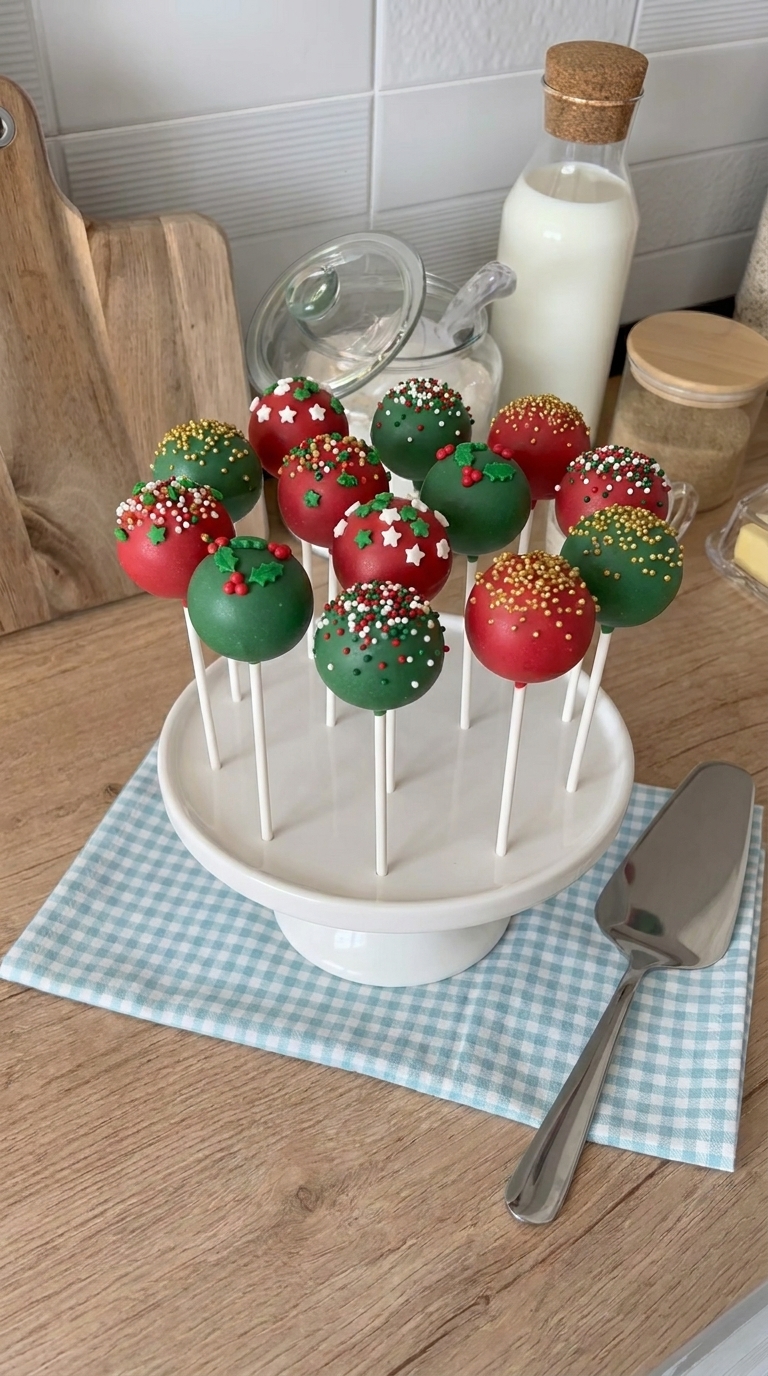
Christmas Cake Pops with Red and Green Candy Coating
You can begin with a boxed-mix cake or a homemade cake, as long as it is baked and completely cooled. The assembly does not require further baking, but you do need time to chill the centers and let the coating set.
An easy way to dress up a baked cake
Cake pops are made by mixing fine cake crumbs with just enough frosting to hold them together. The mixture is shaped into balls, chilled, secured to sticks, and dipped into melted candy coating.
This version uses two coating colors for a festive assortment. The smooth shells contrast with the dense, soft cake centers, and a few simple decorations make each one look different without complicated piping.
- Use a cooled 9 × 13-inch cake in your favorite flavor.
- Choose simple sprinkles or small edible holiday decorations.
- Make the centers ahead, then dip and decorate in batches.
Ingredient and equipment tips
Vanilla frosting acts as a binder. Start with a few tablespoons rather than adding the full half cup at once. Moist cakes usually need less frosting; the mixture should hold when squeezed without feeling wet or greasy.
Melt red and green candy wafers separately. Tall, narrow dipping glasses make it easier to cover each cake ball without rolling it around. Keep a cake-pop stand or food-safe foam block nearby so the finished pops can dry upright.
How to keep cake pops on their sticks
Roll evenly sized balls and chill them before adding the sticks. Dip the tip of each stick in melted candy coating, then push it about halfway into the cake ball. Chill again so that small amount of coating can firm up and anchor the stick.
Dip with a gentle downward motion, lift straight out, and let excess coating drip away. Avoid stirring the cake pop inside the glass or tapping hard. The centers should be firm and chilled, but not frozen solid when they meet the warm coating.
Simple Christmas decorating ideas
Sprinkle decorations onto the coating while it is still wet. Red pops look lovely with white sprinkles and gold sugar pearls; green pops can be finished with red and white nonpareils or small edible holly decorations.
Keep decorations small so they do not make the pops top-heavy. Let the shells set fully before wrapping in individual treat bags. Ribbon goes around the outside of the bag, away from the food.
Make ahead and storage
Prepare the shaped centers a day ahead and keep them covered in the refrigerator. Finished cake pops can be refrigerated in an airtight container for up to four days. Storage needs can vary with the cake and frosting you choose.
To limit condensation on the shells, allow a refrigerated container to warm slightly while still closed before opening it. Avoid hot display areas, where candy coating can soften. Add extra chilling or setting time whenever the centers or shells need it.
Frequently Asked Questions
Are these completely no-bake?
The assembly is no-bake when you start with an already baked cake. If you bake a fresh cake first, add its baking and cooling time to your schedule.
Why do my cake pops fall off?
The mixture may contain too much frosting, the balls may be too large, or the sticks may not be anchored firmly. Chill the centers and let the candy coating around the sticks set before dipping.
Why did the coating crack?
A large temperature difference can contribute to cracking. Let very cold centers lose their freezer chill and avoid overheating the coating.
Recipe card
Christmas Cake Pops
Soft cake centers dipped in red and green candy coating and finished with festive edible decorations.
Equipment
- Large bowl and cookie scoop
- Parchment-lined tray
- 24 lollipop sticks
- Two microwave-safe dipping containers
- Cake-pop stand or food-safe foam block
Ingredients
Cake centers
- 1 baked 9 × 13-inch cake, completely cooled
- Up to 1/2 cup vanilla frosting, added gradually
Coating and decoration
- 8 ounces red candy melts
- 8 ounces green candy melts
- Assorted edible Christmas sprinkles
- Small edible holly decorations or sugar pearls, optional
Instructions
- Make fine crumbs
Break the cooled cake into fine crumbs in a large bowl. Remove any hard edges that will not crumble smoothly. - Add frosting
Mix in a few tablespoons of frosting, adding more only until the crumbs hold together when pressed. You may not need the full half cup. - Shape and chill
Divide into about 24 portions and roll into smooth balls about 1 1/2 inches across. Arrange on the lined tray and refrigerate for about 30 minutes. - Anchor the sticks
Melt a little candy coating. Dip about 1/2 inch of each stick into it and insert halfway into a cake ball. Chill for about 30 minutes, or until the sticks feel secure. - Melt the coatings
Melt the remaining red and green candy wafers separately, following the package directions and stirring frequently. Transfer to tall dipping containers if useful. The coating should be fluid and warm, not very hot. - Dip and decorate
Dip each chilled cake pop straight into a coating. Lift gently and let excess drip back into the container. Add sprinkles or edible decorations immediately. - Let set
Place upright in a stand and allow the coating to harden completely before serving or wrapping. Allow additional time as needed for your coating and room temperature.