

Apple and Custard Kataifi Pie with Cinnamon Apples
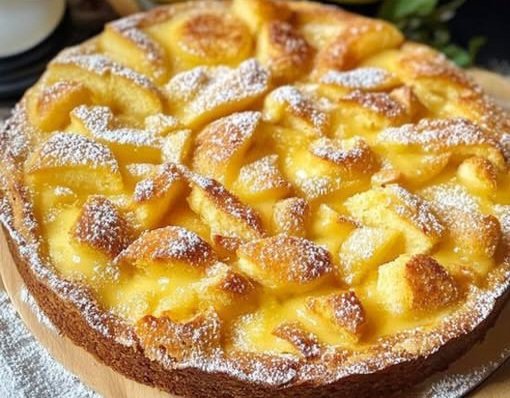
Cut into this apple and custard kataifi pie and the pastry gives a delicate crackle before the knife reaches the soft filling. Inside are two generous layers: smooth vanilla custard and cinnamon-scented apples, tucked between buttery strands of golden kataifi. A little honey-lemon syrup settles into the pastry, giving it a glossy finish without hiding that lovely toasted flavor.
It has the familiar comfort of apple pie, but a completely different crust. Instead of rolling dough, you loosen fine pastry strands with your fingers and toss them with melted butter. The filling takes a little care, and the finished pie needs time to chill, but each part is straightforward. This is a good dessert for a Sunday lunch or a dinner you want to prepare for ahead of time.
Jump to the recipe • Step-by-step instructions • Storage • FAQs
What is apple and custard kataifi pie?
Kataifi is a fine, threadlike pastry used in many Greek, Turkish, and Middle Eastern desserts. You may see it labeled kadayif or shredded filo pastry. Once buttered and baked, the strands turn crisp and golden, with plenty of little edges to catch the syrup.
This version uses that pastry to enclose vanilla custard and cooked apples. This layered apple dessert takes its inspiration from syrup-soaked kataifi sweets. The apples stay in pieces, the custard provides a creamy middle, and the pastry brings the crunch.
Before you begin
Use raw kataifi pastry. Ready-toasted kataifi is useful for other desserts, but it is not a direct substitute here. If yours is frozen, thaw it in the refrigerator according to the package directions before starting. Keep it wrapped until you are ready to separate the strands.
Choose apples that hold their shape. Granny Smith gives a pleasantly tart filling; Braeburn or Pink Lady adds more sweetness. A mixture is lovely. Cook off the excess juice before assembling so it does not soak into the bottom crust.
Allow time for chilling. Warm custard will not give you those neat layers when sliced. Plan on about 6 hours from starting to serving, including a minimum 3-hour chill. Most of that time is hands-off.
Apple and Custard Kataifi Pie Recipe
Servings: 10
Pan: 9-inch (23 cm) springform pan, at least 2 1/2 inches (6 cm) deep
Active preparation: about 45 minutes
Oven time: 65–80 minutes, in two stages
Cooling after baking: about 45 minutes
Chilling: at least 3 hours
Total: approximately 5 1/2–6 hours, with some preparation overlapping the baking
For the kataifi pastry
- 400 g (14 oz) raw kataifi pastry, fully thawed if frozen
- 180 g (6.3 oz) unsalted butter, melted, plus a little extra for greasing
For the apple filling
- 700 g (about 1 1/2 lb) peeled, cored apples, cut into 1/2-inch (1.5 cm) pieces; buy about 1 kg (2.2 lb) whole apples
- 2 tablespoons (28 g) unsalted butter
- 1/4 cup packed (55 g) light brown sugar
- 1 1/2 teaspoons ground cinnamon
- 1 tablespoon lemon juice
- 1 small pinch of fine salt
For the vanilla custard
- 600 ml (about 2 1/2 US cups) whole milk, divided
- 90 g (a scant 1/2 US cup) granulated sugar
- 60 g (about 1/2 US cup) cornstarch, also called cornflour in the UK
- 3 large egg yolks
- 2 teaspoons vanilla extract
- 2 tablespoons (28 g) unsalted butter
- 1 small pinch of fine salt
For the honey-lemon syrup
- 150 ml (about 2/3 US cup) water
- 120 g (about 1/2 US cup plus 1 tablespoon) granulated sugar
- 2 tablespoons (40 g) honey
- 1 tablespoon lemon juice
A quick measuring note: the weights and milliliters are the main measurements; the cup equivalents are approximate. Use cornstarch for the custard, not yellow cornmeal. The pastry, custard, and syrup each contain butter or sugar for a different purpose, so keep the ingredient groups separate as you work.
How to make apple and custard kataifi pie
1. Cook the cinnamon apples
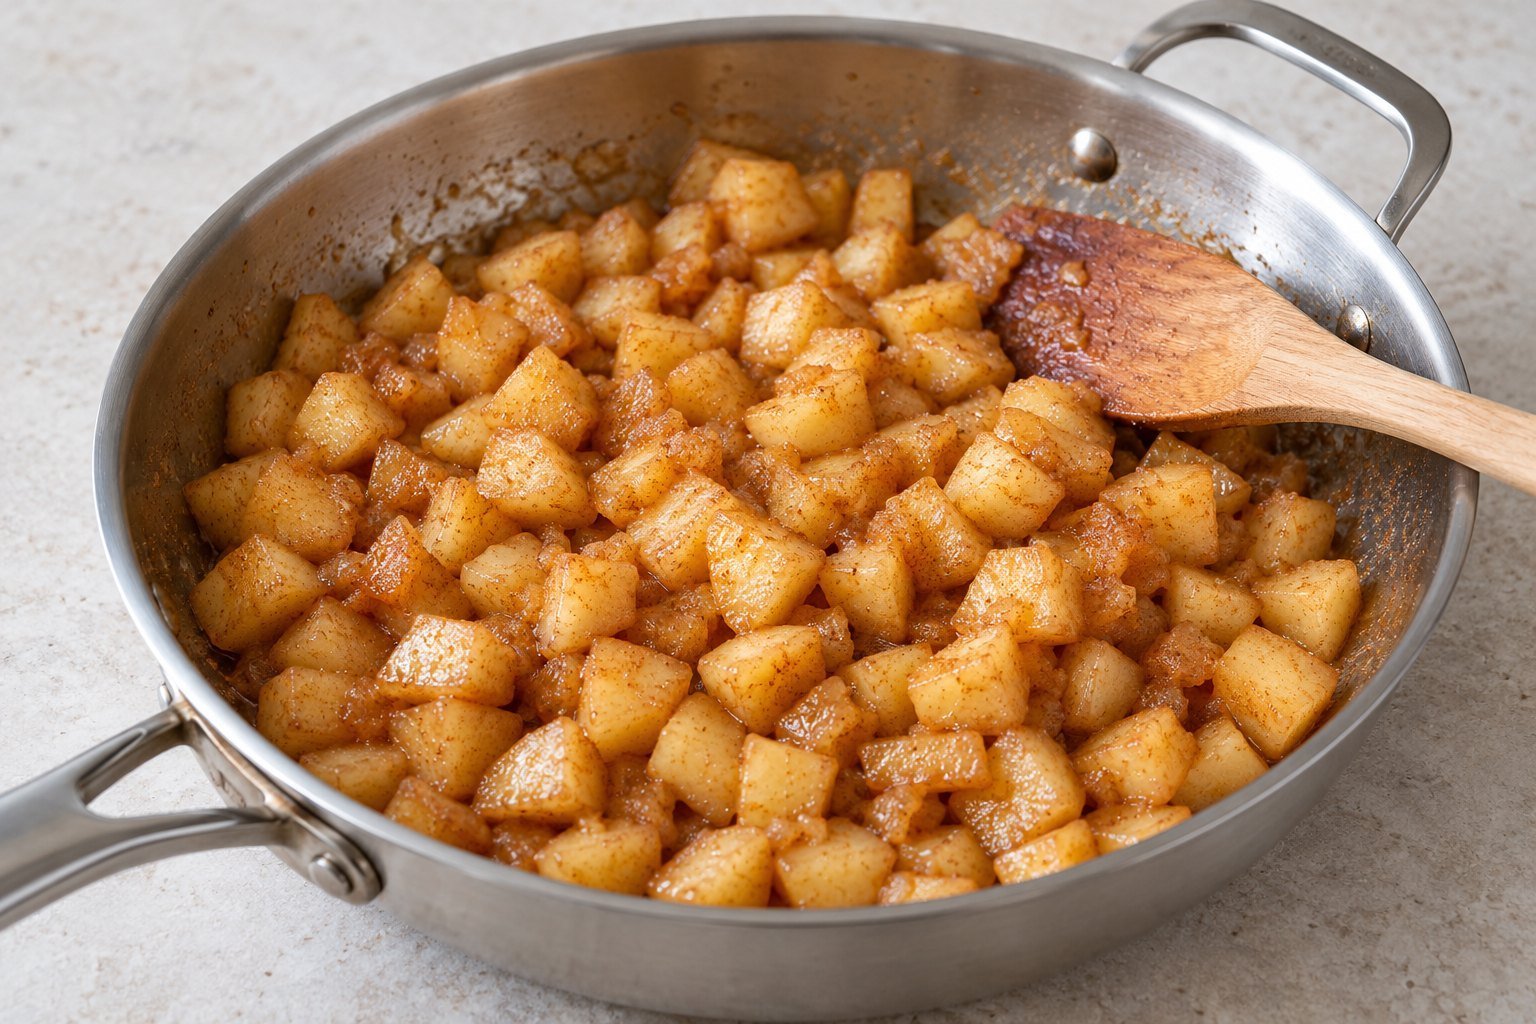
Melt the 2 tablespoons of butter in a wide skillet over medium heat. Add the chopped apples, brown sugar, cinnamon, lemon juice, and salt. Cook for 10–15 minutes, stirring regularly, until the pieces are tender at the edges but still hold their shape.
If the apples release a lot of juice, keep cooking until the liquid has reduced to a light coating. A spatula drawn through the pan should leave a trail rather than a puddle. Spread the apples on a large plate to cool while you make the custard.
2. Make the thick vanilla custard
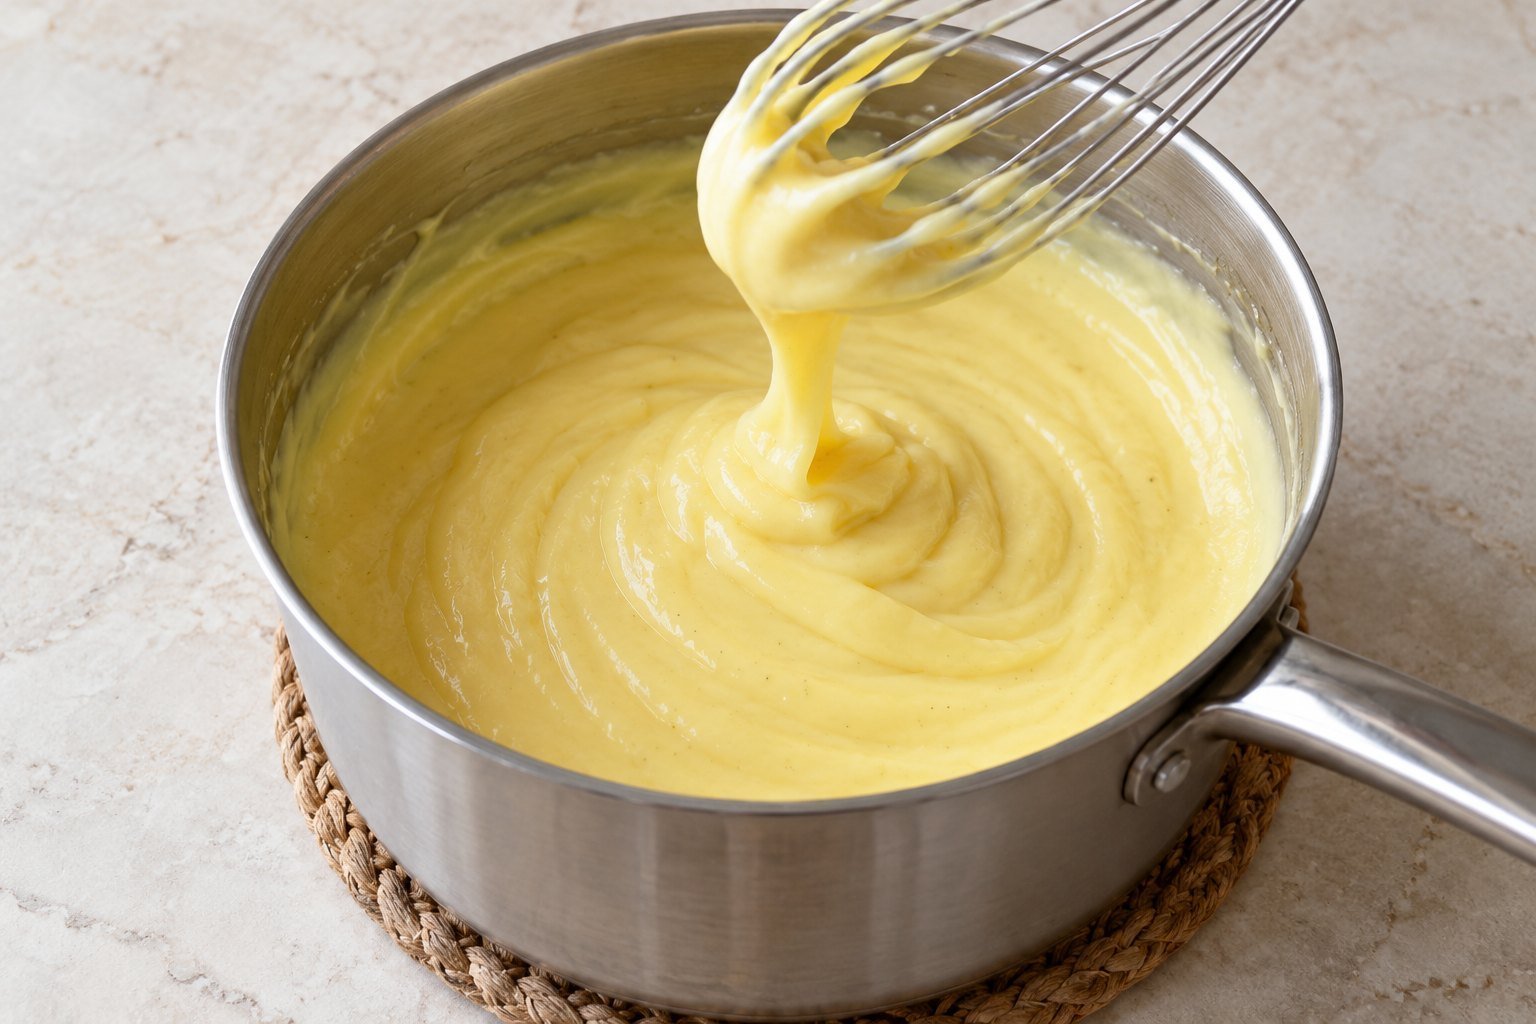
Put 450 ml of the milk in a saucepan and warm it over medium heat until steaming. In a bowl, whisk the remaining 150 ml milk with the sugar, cornstarch, egg yolks, and salt until completely smooth. Pour the hot milk into this mixture in a slow stream, whisking constantly.
Return everything to the saucepan. Cook over medium-low heat, whisking across the bottom and into the corners, until the custard thickens and large, slow bubbles break the surface. Reduce the heat and cook for 1 minute more, continuing to whisk. It should be thick enough to hold a soft mound, rather than pour like a custard sauce.
Take the pan off the heat and stir in the vanilla and butter. Transfer the custard to a shallow bowl and cover its surface directly with food wrap suitable for warm food. Let it cool until lukewarm while you prepare the pastry. If making it well ahead, refrigerate promptly, then whisk it smooth before using.
3. Make the syrup and prepare the pan
Combine the water, granulated sugar, honey, and lemon juice in a small saucepan. Bring to a gentle boil, stirring until the sugar dissolves. Simmer for 3 minutes, then remove from the heat. Leave the syrup to cool completely; it will be spooned over the pie while the pastry is hot.
Heat the oven to 350°F (180°C), conventional heat. Grease the springform pan and line its base with baking parchment. Wrap the outside bottom and seam with foil to catch small leaks, and stand the pan on a rimmed baking sheet. The foil is a precaution; the baking sheet is still needed.
4. Butter the kataifi and bake the base
Gently pull the kataifi apart in a large bowl. Take a little time here: compact knots stay pale and doughy inside. Drizzle over the melted butter in several additions, tossing with your fingers until the strands feel evenly coated.
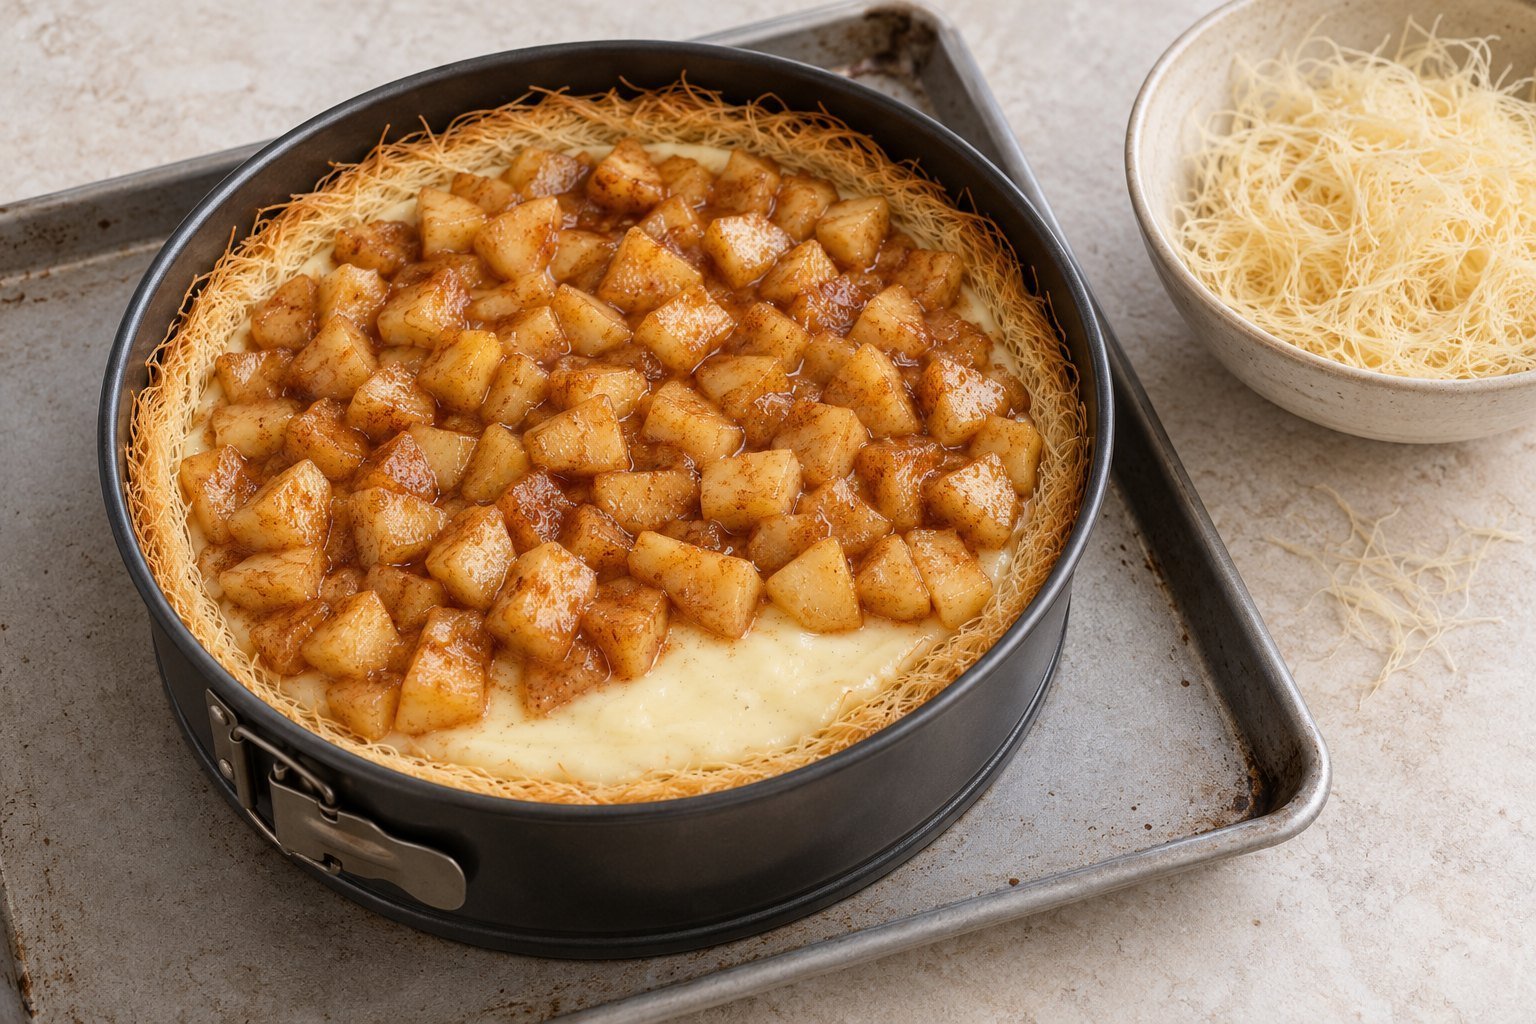
Weigh out roughly three-fifths of the buttered pastry for the base, leaving two-fifths for the top. Press the larger portion into an even layer across the bottom and about 1 inch (2.5 cm) up the sides. Press firmly enough to make a connected base, but do not squash it into a hard mat. Cover the reserved topping pastry so it does not dry out.
Bake the base for 20–25 minutes, until lightly golden. Let it stand for 10 minutes. Reduce the oven to 340°F (170°C).
5. Add the custard and apple layers
Stir the lukewarm custard until smooth, then spread it carefully over the baked base. Work from the center outward with the back of a spoon, keeping the pastry rim intact. Spoon the cooled apples evenly over the custard, leaving any loose liquid behind.
Scatter the reserved buttered kataifi over the apples. Tease it into an even covering and tuck stray strands inside the pan. Pat it very lightly so the top holds together; leave enough space between the strands for the heat to circulate.
6. Bake until deeply golden
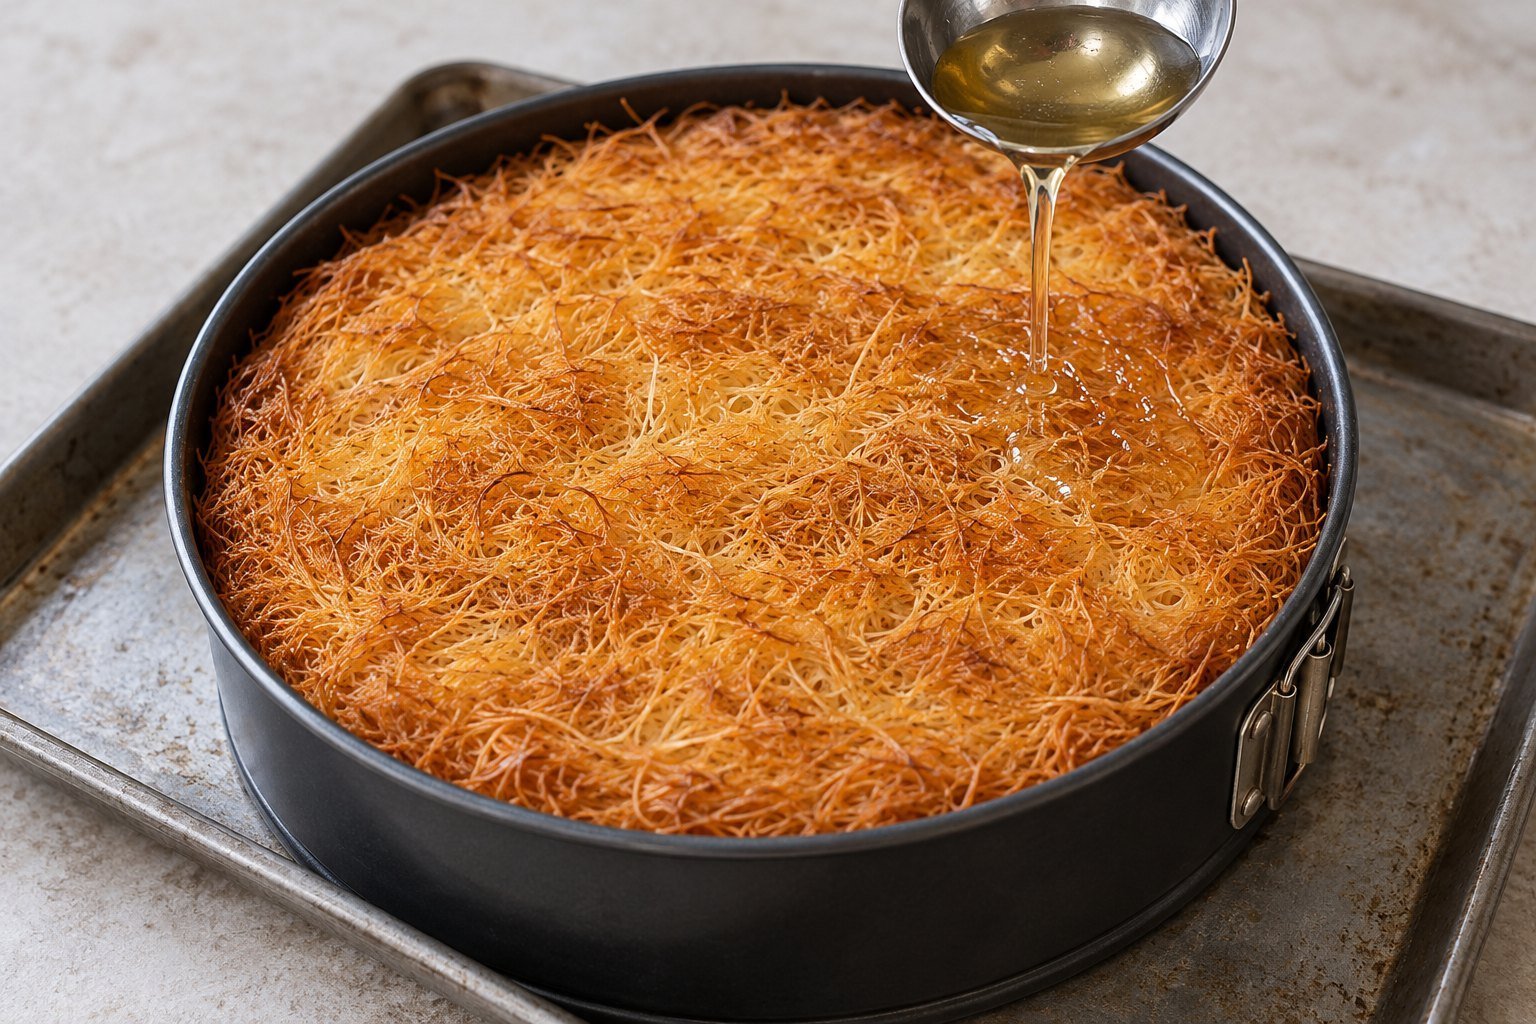
Bake on the lower-middle oven rack for 45–55 minutes. The top should be an even, deep golden color, with crisp strands all the way across. If the surface browns too quickly, place a loose tent of foil over the pan for the rest of the baking time.
Do not stop at the first hint of color. The filling gives off moisture as it heats, so the pastry needs enough time to dry and toast. Keep the pie in its pan when it comes out of the oven.
7. Add the cooled syrup
Slowly spoon the cooled syrup over the hot pie in several passes, moving across the top and around the edges. Let each spoonful soak in before adding the next. If syrup is pooling on the surface instead of absorbing, pause; you do not need to force in the last spoonful.
The pastry will sizzle gently and take on a light sheen. You are moistening the strands, not trying to submerge the pie. Leave it on a rack for about 45 minutes, until the pan is no longer very hot, then refrigerate. Get it into the refrigerator within 2 hours of coming out of the oven.
8. Chill, unmold, and slice
Chill the pie for at least 3 hours, until the center is cold and the custard has set. Once cold, cover loosely. Run a thin knife around the inside of the tin before releasing the springform ring.
Use a serrated knife to cut gently through the crisp top, then a clean sharp blade to finish each slice. Wipe the blade between portions. For the cleanest layers, cut the pie cold; let each slice sit for 10–15 minutes before eating if you prefer the custard a little softer.
Little details that make a difference
- Dry apples make a better pie. A glossy coating is enough. Watery filling softens the pastry underneath and makes the layers slide.
- Use thick custard, not pouring custard. A carton of ready-made sauce will not usually set firmly enough for this recipe.
- Separate the pastry thoroughly. Butter can coat loose strands much more evenly than dense clumps.
- Let the syrup cool first. Make it early so you are not waiting with a hot pie on the counter.
- Expect a little softening. Pastry touching the custard naturally becomes tender. The exposed top and outer edges keep the most crunch, especially on the day of baking.
- Keep the topping light. Pressing it hard creates a dense lid that is difficult to cut without squeezing the filling.
Serving ideas and simple variations
The pie is rich enough to serve on its own. A spoonful of plain Greek yogurt or lightly whipped cream makes a nice contrast, especially if you enjoy a less sweet finish. Coffee and unsweetened tea work well alongside the honey and cinnamon.
For a slightly different flavor, add a teaspoon of finely grated orange zest to the custard, or a small pinch of ground cardamom to the apples. Keep the amount of fruit and liquid the same. If serving guests with allergies, remember that the standard recipe contains wheat, milk, and eggs.
Storage and make-ahead advice
Refrigerate leftovers: keep the pie covered in the refrigerator at 40°F (4°C) or below and eat within 3–4 days. The pastry is at its best on the first day and gradually softens as it sits beside the custard. Avoid leaving the pie out for more than 2 hours, or 1 hour in temperatures above 90°F (32°C), following USDA storage guidance for perishable leftovers.
Prepare components ahead: cook the apples and custard up to a day ahead, cool them promptly in shallow containers, and refrigerate separately. Make the syrup ahead too. Assemble and bake the next day, allowing a little extra oven time if the fillings are refrigerator-cold. Chill the baked pie before slicing.
Freezing: this dessert is better made fresh. Freezing can make a cornstarch custard release water after thawing, and the pastry loses some of its crispness. For a gathering, preparing the separate fillings ahead is the more reliable option.
Frequently asked questions
Can I use regular filo sheets instead of kataifi?
Filo sheets make a different kind of crust and need a different layering method. They will not give this pie its tangled, crisp topping. Use raw kataifi for the texture shown here.
Can I use ready-made custard?
Only a very thick pastry cream that is designed to hold its shape could replace this filling. Ordinary pouring custard is too loose. The homemade custard in the recipe is thickened specifically for slicing.
Why is my custard lumpy?
The starch may not have been fully mixed into the cold milk, or the pan may have developed hot spots. Whisk the cold mixture smooth before adding hot milk, and keep the whisk moving during cooking. If needed, press the warm custard through a fine sieve before it cools.
Why did the kataifi turn soggy?
The most common causes are watery apples, pastry that was not baked long enough, or too much syrup added at once. Some tenderness where pastry touches custard is normal; a completely wet top is a sign that moisture was not controlled.
Can I leave out the honey?
Yes. Replace the honey with 30 g granulated sugar and add an extra tablespoon of water to the syrup. The flavor will be a little cleaner and less floral.
Can I serve the pie warm?
You can spoon it out while warm, but the custard will be softer and the layers less tidy. For a slice like the one shown, chill the pie first and serve cool or let individual slices lose their chill briefly.
Do I need a springform pan?
A springform pan makes unmolding much easier. A deep, similarly sized baking dish can work if you plan to cut and serve directly from it. Do not try to turn a filled custard pie upside down to remove it.
More desserts to bake next
If you enjoy the apple-and-spice combination, try our apple spice dump cake. For another creamy filling with a crisp base, browse the pumpkin pie bars with shortbread crust, or find more ideas in Baking & Sweets.
Give the pie enough time to set, then bring it to the table whole and slice it there. The golden strands and the pale custard do most of the decorating for you.

One Comment